Welcome to the internal, working part of the SciArt website!
You've found this message on your Dashboard, which is where you will also find the project(s) that you submitted to us after the Summer School, in August of last year - the content is there for you to updated and edit so please feel free to do so. Please bear in mind that this content will be used to make up the catalogue of the exhibition and will be rendered public once the exhibition opens. On your Dashboard you will also find a Message Board which we will be using to share news, communications and updates to all of you so please make sure you check this regularly.
You will also be able to add all of your collaborators to work on and edit a project, and we will ensure that they are able to also access the site and work on this project.
Below is the set of guidelines for accessing and working on the site which you also received by email, which you can come back to, if you are unsure about some features of the site.
As always, please do not hesitate to get in touch for any thoughts/queries/comments on this process!
Have fun,
JRC SciArt
1. Registration
• You will receive an email inviting you to register in the internal space of the SciArt website
• Clicking on the link, you will be brought to the ECAS log in web page. The ECAS login is linked to the email account you used to access the European Commission portals for the first time.
• After 24 hrs from the first log-in attempt, you will receive an email from the JRC-Resonances account informing you that your profile has been activated and you can now enter your personal space within the SciArt webpage.
Note that this personal space is your playground. Users who are the "lead artists” of their proposals will have the possibility to invite collaborators (other artists and/or scientist within and outside of the JRC), who will follow the same log in procedure. This invitation is done by adding the name, surname and the email address of the collaborator(s) in the free text field “Additional Collaborators” in the "Edit" mode of your Project.
Please limit these invitations to the persons actively participating to your project and needing access for further contributions.
Please keep in mind that this registration implies your having signed and sent the consent form that your received from the JRC-Resonances email and that you comply with the data privacy policy of the SciArt team.
2. Accessing your SciArt Dashboard
When you log into the SciArt website you will be taken to your personal dashboard - here you can find all the projects you are involved in, which you will be able to edit and work on.
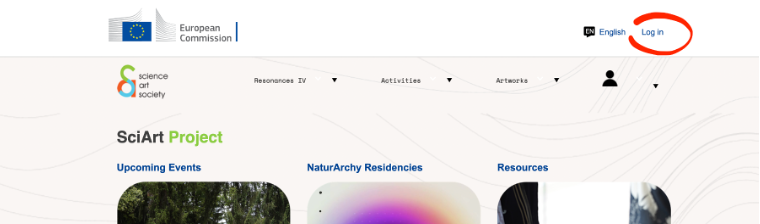
a. To access your internal SciArt Dashboard you have to head over to the SciArt website: https://science-art-society.ec.europa.eu/front & go to the “Log In” link in the top right hand corner of the webpage.
!! Please bear in mind that, as explained in chapter 1, the first ever time you attempt to log in you will get an automatic reply stating that your account needs to be approved by the system administrators (that’s us don’t worry). This will generally happen within 24 hrs and you will be notified via email that your account is active.
b. Clicking on the "Log In" link will take you to the standard EU login portal, so you just need to put in your ECAS details (the ones you use for any EC website).
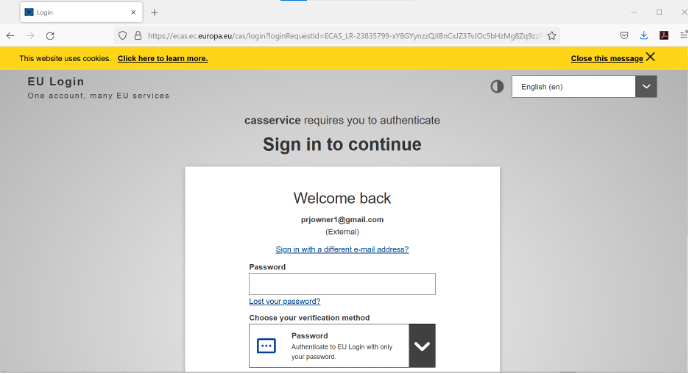
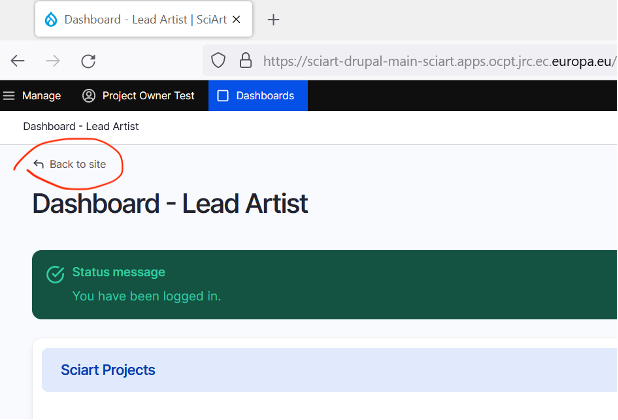
c. Once you are logged in, you are taken directly to your personal dashboard.
d. At the top of the dashboard you will see a “Back to Site” arrow which allows you to go back and browse the rest of the site as before (in Read-only mode) as well as give you the choice to log out.
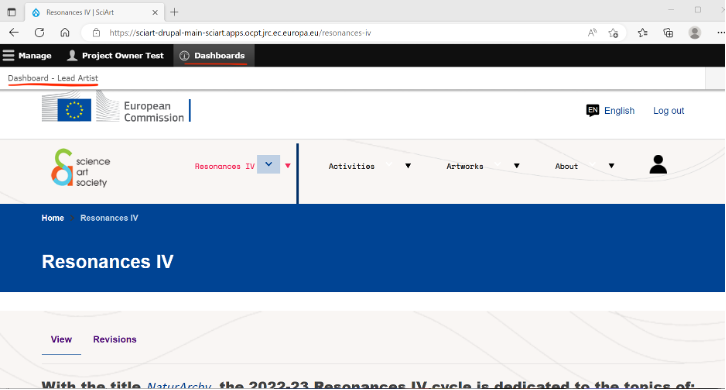
e. You will see a black bar at the top of your screen, with your Username and a “dashboard” sign.

f. Click on “Dashboard”. A white bar will pop-down below, where you will see listed a “Dashboard - User”* title. Click on this title to return to your specific Dashboard.
*User type: this will vary depending on your role in the project.
- If you are the artist who submitted a proposal, your User Role will be “Lead Artist”
- If you are a collaborating Scientist/Policymaker/Artist/Other, your User Role will be “Fellow”.
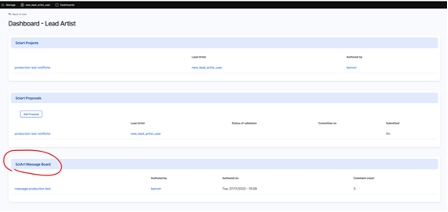
3. What can you see on your dashboard?
a. On you Dashboard you have three sections “Projects”, “Proposals” & “Message Board”.
b. In the “Projects” section you will find working pages for the projects which have been approved by the SciArt team for residency & further development. The content has been taken from what you submitted to the SciArt team for evaluation in Aug 2022 - so it will need updating from you. Every team member will be able to edit and work on the project in which they are involved - artists, scientists and policymakers.

- Some parts of the project will be used quite early on, e.g. the “short description”, making up communication and publicity materials such as one-page cards that we will put next to each project for people to collect during their visit to the exhibition.
- The rest of the text will be used for the catalogue. That means that this text with its pictures will be extracted for further processing.
- At the opening of the exhibition, these projects will be “published”, i.e. made available for all non-registered visitors of the sites.
c. The “Proposals” section contains archives of the proposals you initially submitted. These are no longer editable, as the work has been approved for development as a Project.
- You normally get an email when the Proposal you have been working on is promoted to “Project” stage. This means that the project has been accepted for further development by the JRC SciArt team.
- On your Dashboard you will automatically see Projects as we have moved forward in the project development step due to the later development of the site.
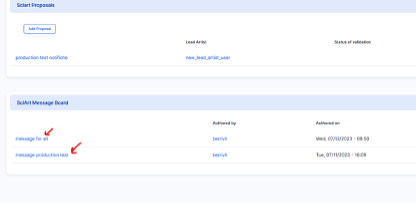
d. The “Message Board” is the central page which the SciArt team will use to disseminate all messages to the entire group of authenticated users.
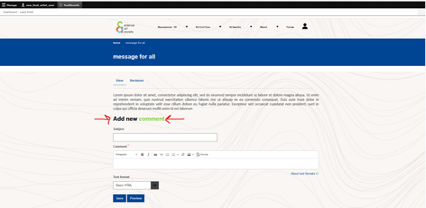
- You will be able to see (but not edit) all the messages posted by the SciArt team and you will be able to both comment and see all the comments on all of these posts.
4. Working on and Editing a Project
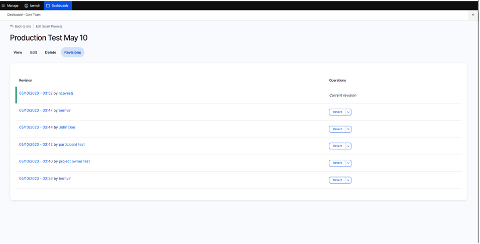
To begin working on a project click on its title where you see it on the Dashboard.
a. You will be taken to a page where you see the project as it currently exists on the site.
b. Right below the blue band where the title of the project is, you will see a yellow button “Back to Dashboard” which you can use to go back to your Dashboard.
c. You will also see different options which allow you to interact with the content of the project: “View”, “Edit”, “Delete”, & “Revisions”.
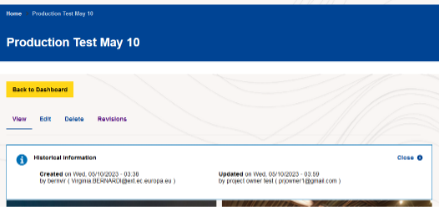
- The “View” corresponds to the landing page of the project that you are taken to when you click on the link on the Dashboard.
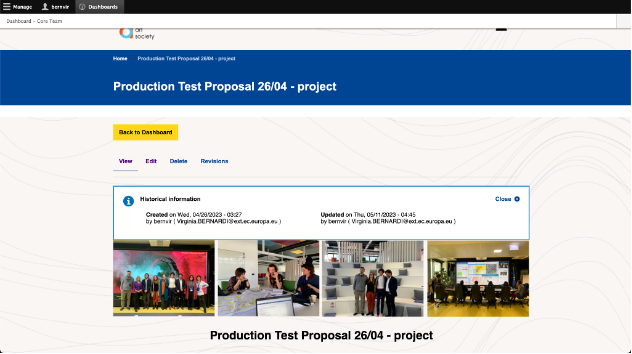
- The first part of the project, General Information, is “computed”, i.e. it collects some of the information on the project automatically. You can change this information by editing the original fields below this General Information section in the “Edit” mode.
- “Revisions” shows you all the versions of the project that have been saved - so if you save your work, then make changes, but later want to go back to the earlier versions you can .
- Clicking on “Edit” is what allows you to actively work on the project, taking you to another page where you can edit/add text, images and documents.
- When you edit and save a project you are collaborating on, all the collaborators involved will receive an email that the project has been updated.
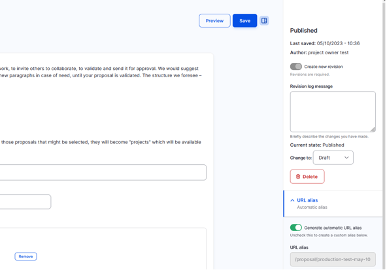
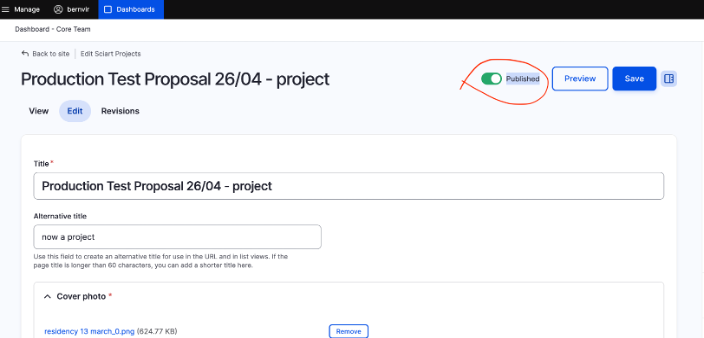
a. You can change the status of your project from “Published” to “Draft” and viceversa. You can do this either in the right-hand-side column in the “Edit” mode or in the box that will appear, once the project is in “Draft” mode in the “View” of the project (once the project is Published you can edit its status only in the “Edit” mode).
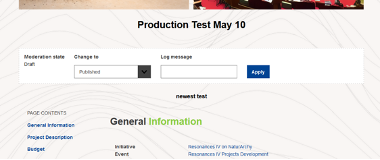
b. The “Draft” mode allows you to work on the project without submitting it as a finalised version. All collaborators of a project will be able to see your work as it is developing.
c. The “Published” mode makes your work visible to all the other people with a need to know, basically limited to the SciArt team and Curatorial Committee at the moment.
d. The order of the content in the “Edit” mode is reflected by the “View” mode.
a. When you go to “Edit” a project you will find different fields. These will be filled in with the content you provided in the proposal you submitted in August. You can update/edit/delete this content as you see appropriate. Where and what to change should be intuitive, though it is not always very clear. That is due to the software the EC uses, unfortunately - take your time to understand the format of these editing pages.
b. Please keep in mind that the sections are fixed and intended to end up in the Catalogue. You have anyway the possibility to add new sections at the bottom of the page, according to your needs. You will have the possibility to add new ones at the bottom of the page, according to your needs.
c. We have some fields where inserting pictures is mandatory, but you can also add pictures within the text in any of the different text boxes.
d. In the “Edit” mode you find a short description below each field which refers to the content of the field and can guide you when editing/uploading content - click on the little question mark to see these.
e. In “Edit” mode, the asterisk after the field description indicates the field is mandatory.
5. List of fields in a Project
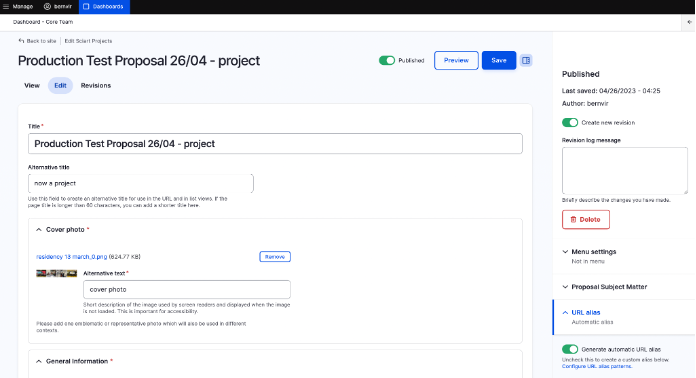
The whole list of fields is as follows (you find a Table below with a mock-up “Edit”-mode page on the website):
(row 1 in Table): the working title/proposed title of your project.
(row 1 in Table): if available, a shorter version of this title
=> mandatory (row 1 in Table): this picture will be used when presenting the project online.
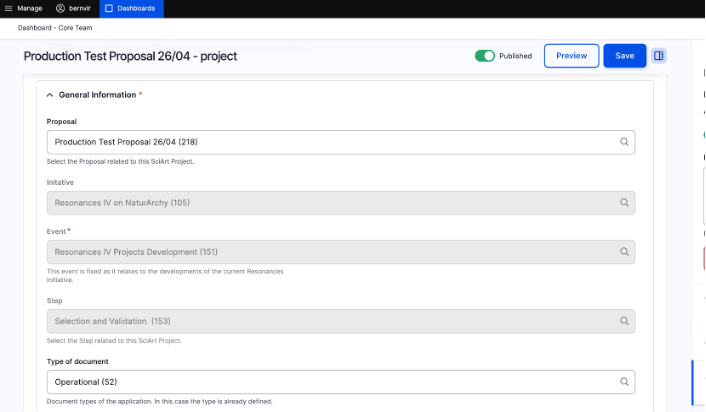
This section contains most of the information relating to your proposal.
This is the stage of your work as it progresses from proposal to project => not editable, fixed by SciArt team (row 3 in Table)
This is the stage wherein we are all working now, Resonances IV Projects Development => not editable, fixed by SciArt team (row 3 in Table)
We have two simple categories to allow better handling these documents. All will work with the “operational” type, only the SciArt team will insert also documents of the “administrative” type => not editable, fixed by SciArt team (row 3 in Table)
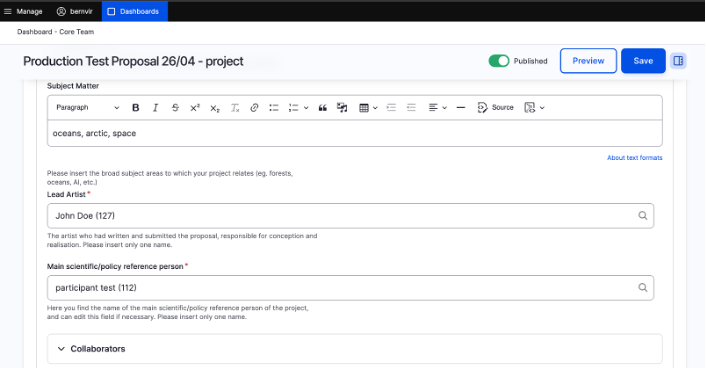
(row 4 in Table): a free text field where you can add tags for the project as you see fit. You can use any separator you like, but we recommend a semi-colon “;”.
As the name indicates, this is the artist leading the group working on a shared proposal, ultimately responsible for the production of the artwork. In case of shared responsibilities, please agree amongst yourselves which single name to put here. You can add the other artists in the “Additional Collaborators” field => mandatory.
If you are the Lead Artist of a proposal, ie. the main person submitting/editing it you have to put yourself otherwise you will not see the proposal on your Dashboard. (row 4 & 5 in Table).
NB: This field will search search for names within our Database, so please start filling in a few letters of a person’s name and their full name should come up for you to add them in the proposal – (they will also need to be registered on the website for this to be possible, see section 1). If the name does not come up, please contact the SciArt team via the Resonances mailbox - JRC-RESONANCES@ec.europa.eu asking us to insert the person.
=> mandatory (row 4 & 5 in Table): as above, please indicate one single scientist as lead of the scientific work (even if responsibilities are shared).
NB: This fields will search search for names within our Database, so please start filling in a few letters of a person’s name and their full name should come up for you to add them in the proposal – (they will also need to be registered on the website for this to be possible, see section 1). If the name does not come up, please contact the SciArt team via the Resonances mailbox - JRC-RESONANCES@ec.europa.eu asking us to insert the person.
For projects with more than 2 people, here you can add the names of any other collaborators, each in a separate field. These are free text fields: you’ll have to write the full name; email; organisation and role of the collaborators, as appropriate. (row 5 in Table)
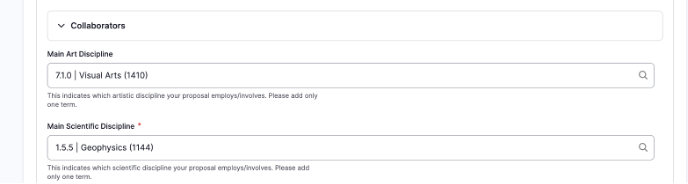
The main artistic discipline of your project.
a. Start to type the discipline you are looking for to find it. This field will search from a simple thesaurus of disciplines based on the OECD categories, and combined with the arts. The fields are numbered for easier understanding. It starts with 1 Natural Science - Mathematics and ends with 7 Arts. You can start typing in the field, either with letters or numbers, and the appropriate entries will appear.
b. The art disciplines are found under the number 7.
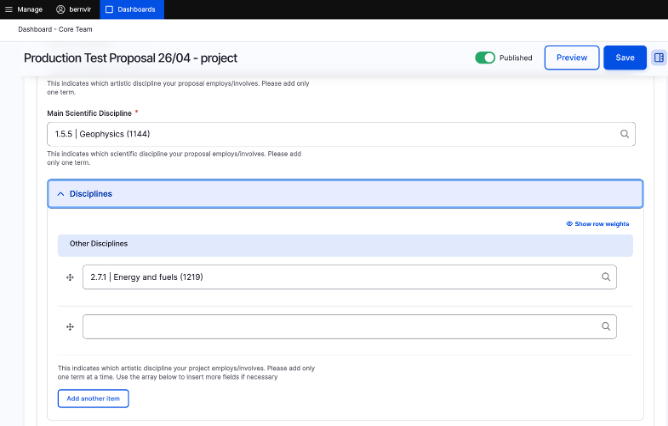
(row 6 in Table): functions in the same way as the Art Discipline field: just start typing what you are looking for. If it does not appear, please email the SciArt team
Functions in the same way as the points above and allows you to include as many disciplines as you like (each one in a separate field).
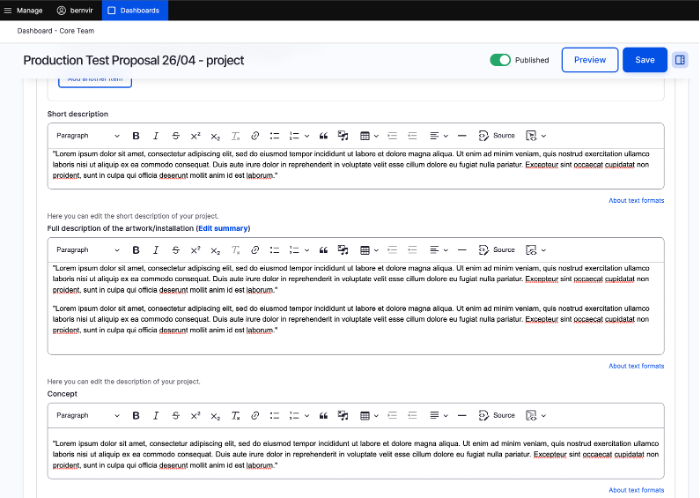
(row 7 in Table): a succinct synthesis of not more than 2000 characters, to be used in material which will be created for the exhibition (including the opening).
(row 7 in Table): the full description of the artwork, as it could figure in the catalogue. It is a free text field, so you can add pictures where you like.
(row 7 in Table): here you can develop the underlying artistic, philosophical or other concepts of your proposal.
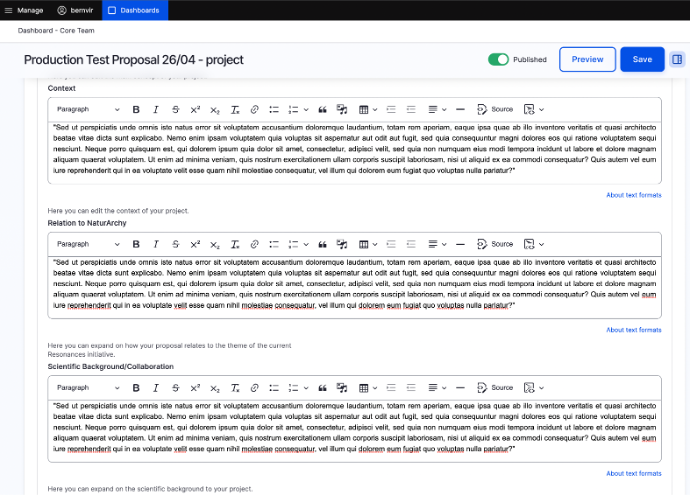
(row 8 in Table): here you can insert the wider context of your project, making links and associations useful to its understanding.
(row 8 in Table): here you can expand on how your project relates to the theme of Resonances IV, adding any reflection you think is valuable for the public.
(row 8 in Table): here you can expound on the scientific background. For scientists and policymakers, this is an excellent occasion to put the spotlight on your scientific work, project, principles, or elaborations, or on the policy that inspired the proposal.
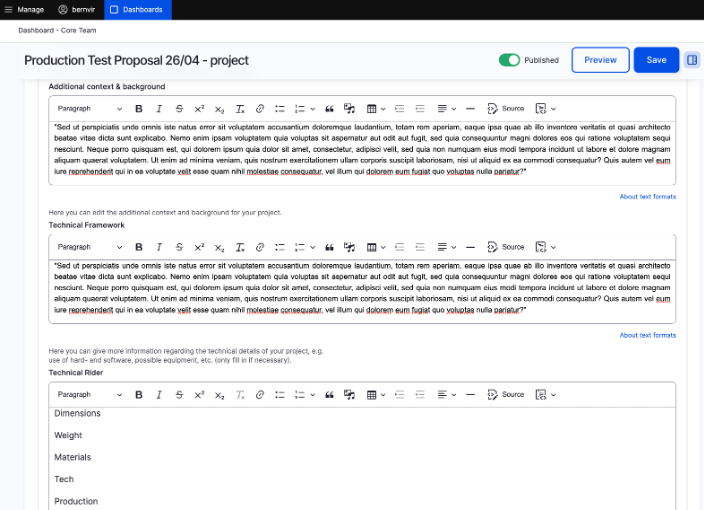
(row 9 in Table): additional context and background for your project.
(row 9 in Table): this should contain the general technical description of your project, pointing out eventual problems in maintenance and repair.
(if needed) (row 9 in Table): this is the full technical rider, as detailed as possible, that will be sent to the producer in order to allow them to provide the necessary hard- and software.
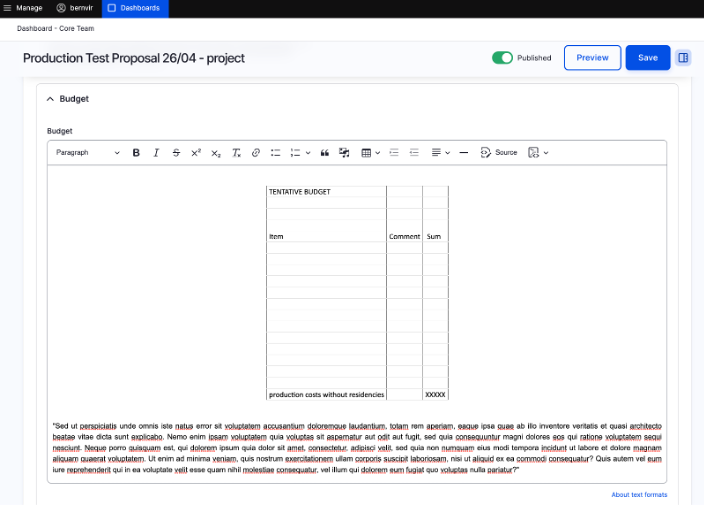
Here you can insert a table: you can copy-paste from an excel spreadsheet, though it will not have all the same functionalites. Please upload the original then at the bottom of the page.
The budget, to be seen by the SciArt Team only. => here you can insert a table (row 10 in Table) You can copy-paste from an excel spreadsheet, though it will not have all the same functionalites. Please upload the original then at the bottom of the page.
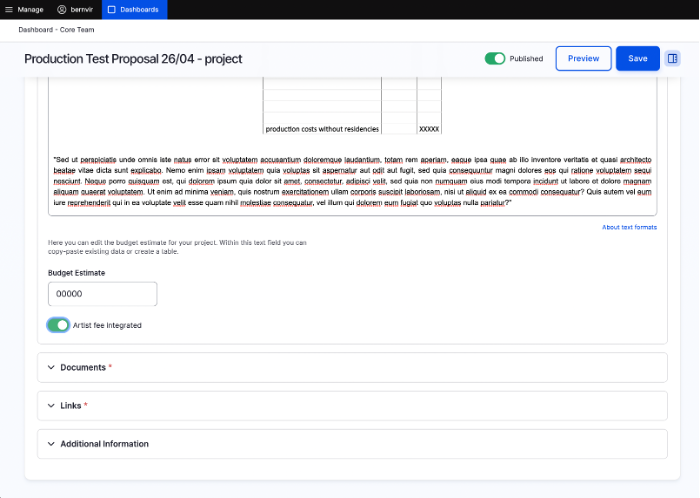
Budget Estimate (row 11 in Table): the overall total estimated budget needed
(checkbox) (row 11 in Table): please check this box if the artist’s fee is integrated in the provided budget.
Please upload any documents (e.g. a pdf as proof of your original input).
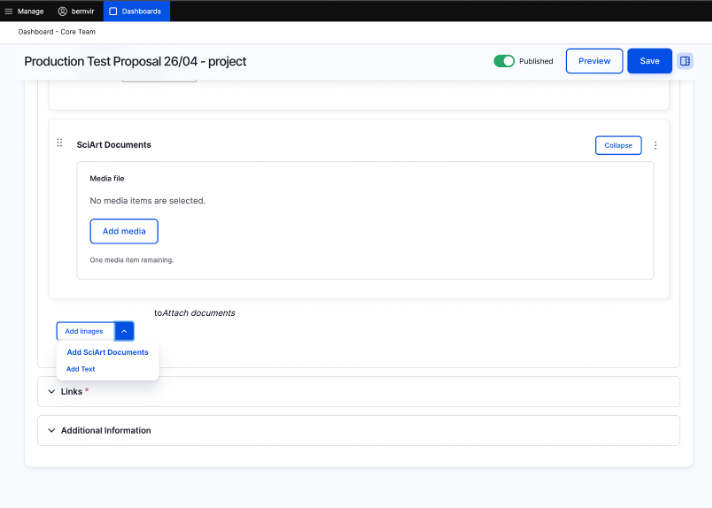
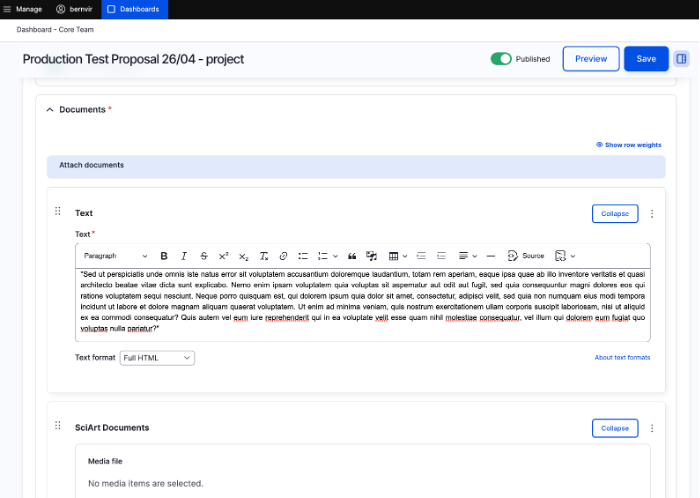
You can add one image per "Document" paragraph type but you can add as many paragraphs as you like. (part of the Documents section - row 12, 13, 14 in Table)
Free Text paragraph which can be filled in (part of the Documents section - row 12, 13, 14 in Table)
Allows you to upload any additional images. You can add one image per "Image" paragraph type but you can add as many paragraphs as you like. (part of the Documents section - row 12, 13, 14 in Table)
Allows you to upload any additional documents (see Row 12, 13, 14 in Table).
To insert a document head to the “Documents” section and toggle the arrow down from where you see “Add Images” to select “Add Documents”.
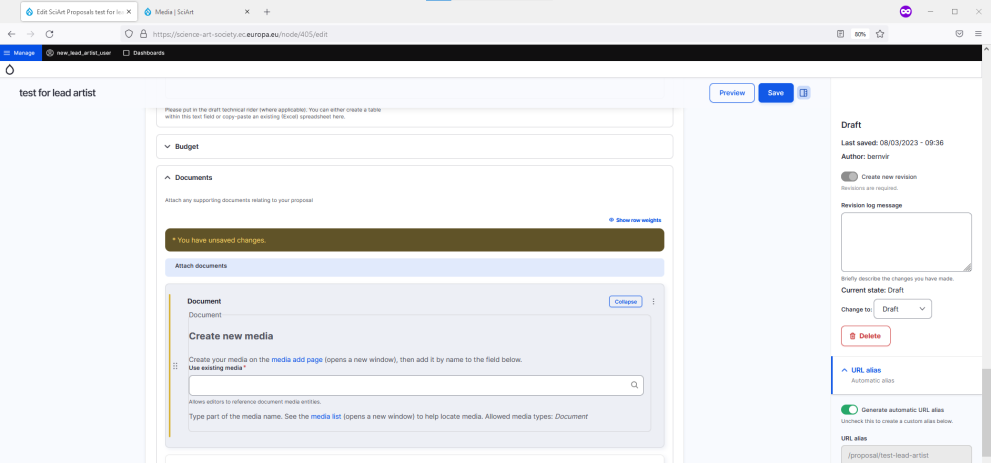
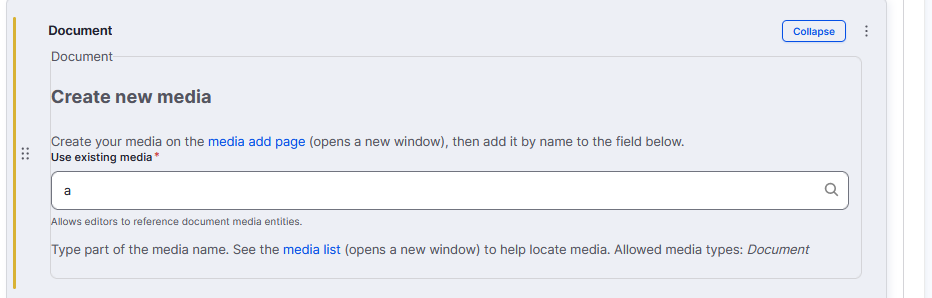
The paragraph that pops up will allow you to add any Media which has been saved in our Media database. To add your specific document or media etc. to this database click on the hyperlinked “media add page” above the search box.
The Media Add Page will automatically take you to a page which allows you to upload a document. Where you see “File Type”, select “Local” and there you will get the opportunity to Browse your own files.
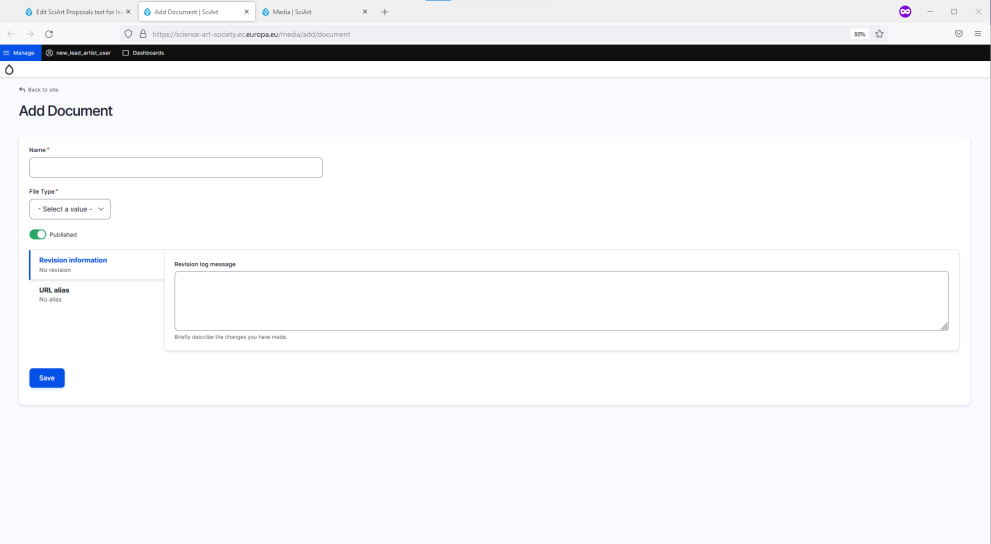

Once the file is selected and uploaded click “Save”. This will ensure that the document is added to the Media database.

Then, go back to the “Edit” page of your project and start typing in a few letters until your specific document is shown as an option below. Select it and you will see it in the “View” of the Project the next time you save it.
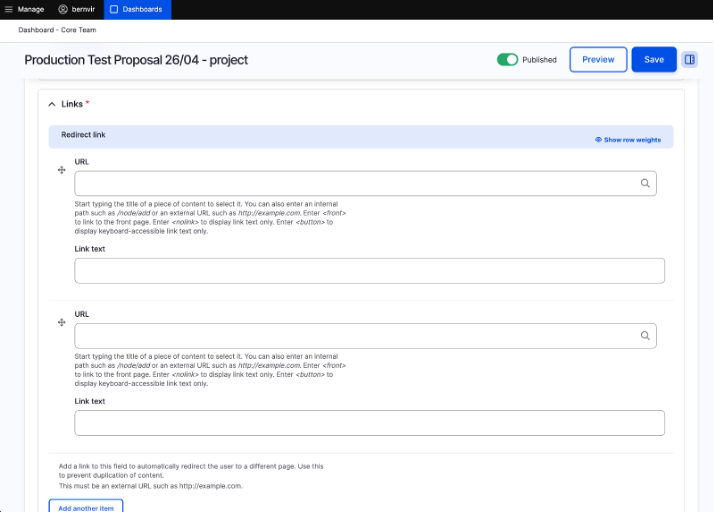
Please add any link you think useful: to your personal website, to any artistic, scientific or policy website, general or specialised information and any other link you think useful for a future visitor to continue their exploration of the themes in the project.
1. Redirect link (row 15 in Table)
Mock-up Project Page
|
1 |
|
Landing page in the “Edit” mode.
|
|
2 |
|
When “Published” is toggled to green this means that your project is no longer a Draft and is made available for viewing to the SciArt team and their collaborators |
|
3 |
|
Not editable fields, already fixed by SciArt team
|
|
4 |
|
Here you can add the names of the Lead Artist and Main Scientific Collaborator of the project – the field searches for names within our Database, so please start filling in a few letters of a person’s name and their full name should come up for you to add them in the proposal.
|
|
5 |


|
For the”Additional collaborators”, you’ll have to add the full names, email, organisation and role of the collaborators, as appropriate (no look-up is foreseen). We will make sure they will find the project on their Dashboard as well.
|
|
6 |
|
These taxonomy fields search for a term within our database, so please start typing a few letters and you should get some terms coming up which you can add in.
For scientific and artistic disciplines, if you do not find the term you are looking for, please send an email to the SciArt team. |
|
7 |
|
Free text paragraphs. The Short description is limited to 2000 characters, the others are (essentially) unlimited. |
|
8 |
|
Free text paragraphs – as above |
|
9 |
|
Free text paragraphs – as above |
|
10 |
|
For the budget you can either create a Table using the Table tool in Drupal |
|
11 |
|
Please indicate your total budget and whether it includes the artist (or artists) fee. |
|
12 |

|
The Documents paragraph lets you upload three types of additional files: Images, additional Text paragraphs and Documents (Word, PDF, Excel).
You have to add one document at a time, and one image at a time. Content will appear in the order you add it in, so if you add in Image, Document, Image that is what you will see in the View. |
|
13 |
|
To insert a document head to the “Documents” section and toggle the arrow down from where you see “Add Images” to select “Add Documents” The paragraph that pops up will allow you to add any Media which has been saved in our Media database. To add your specific document or media etc. to this database click on the hyperlinked “media add page” above the search box. The Media Add Page will automatically take you to a page which allows you to upload a document. Where you see “File Type”, select “Local” and there you will get the opportunity to Browse your own files. Once the file is selected and uploaded click “Save”. This will ensure that the document is added to the Media database. Then, go back to the “Edit” page of your project and start typing in a few letters until your specific document is shown as an option below. Select it and you will see it in the “View” of the Project the next time you save it. |
|
14 |

|
|
|
15 |
|
Here you can add in external links which will open in a new tab.
You can add as many items as you like. |